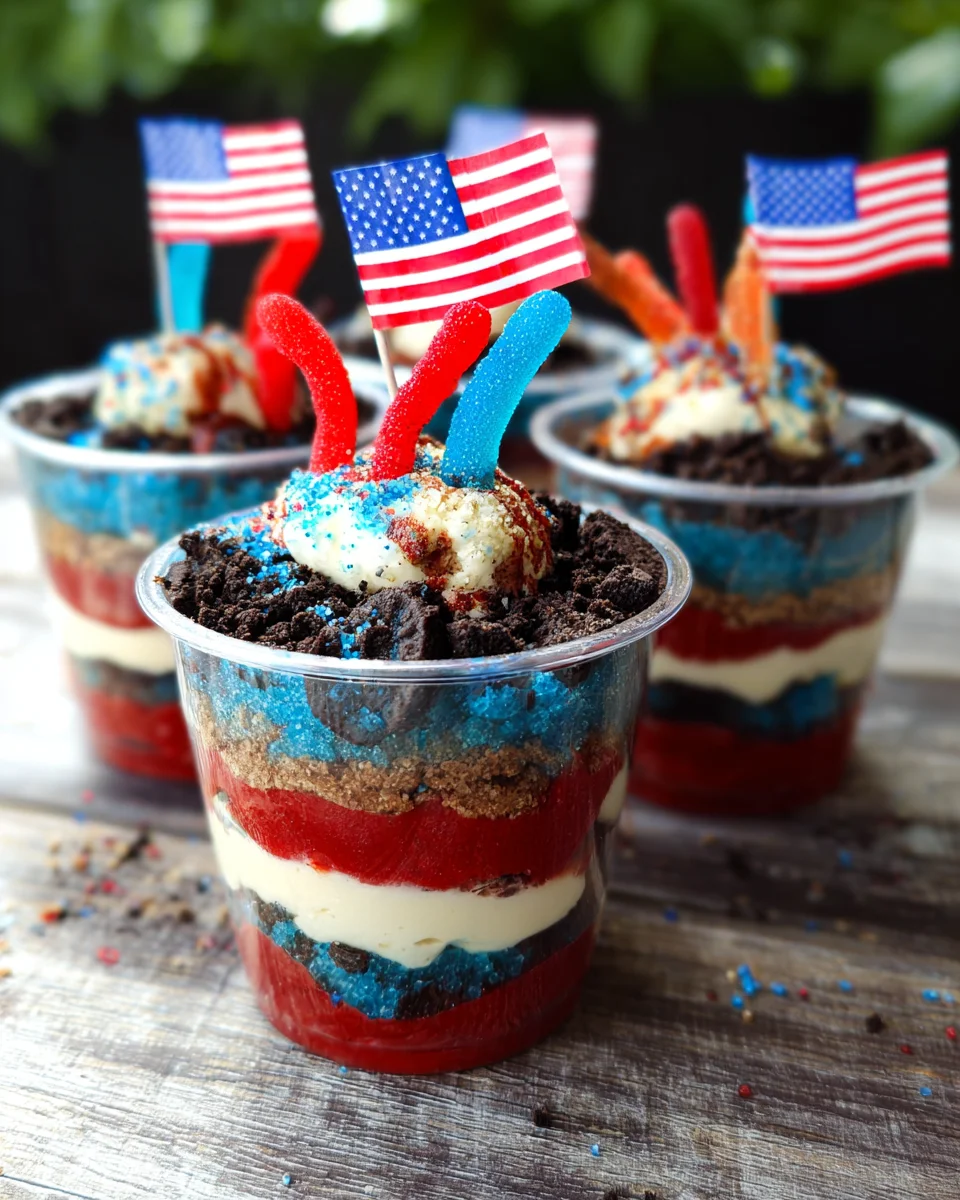
Red, White and Blue Dirt Cups are a delightful and vibrant dessert that perfectly captures the spirit of summer celebrations like the 4th of July. These cups feature layers of creamy cheesecake pudding, crushed Oreos, and colorful toppings that make them a hit at any gathering. Not only are they visually appealing, but they also offer a fun and interactive way for kids and adults alike to enjoy a sweet treat. With their easy preparation and festive look, these dirt cups are sure to become a favorite for any patriotic occasion.
Jump to:
- Why You’ll Love This Recipe
- Tools and Preparation
- Essential Tools and Equipment
- Importance of Each Tool
- Ingredients
- Pudding Base
- Toppings and Layers
- Serving Dish
- How to Make Red, White and Blue Dirt Cups
- Step 1: Prepare the Pudding Mixture
- Step 2: Color the Pudding
- Step 3: Layer Your Cups
- Step 4: Add Fun Toppings
- How to Serve Red, White and Blue Dirt Cups
- Individual Servings
- Party Platter
- Picnic Treats
- Kid-Friendly Serving
- Dessert Bar
- How to Perfect Red, White and Blue Dirt Cups
- Best Side Dishes for Red, White and Blue Dirt Cups
- Common Mistakes to Avoid
- Storage & Reheating Instructions
- Refrigerator Storage
- Freezing Red, White and Blue Dirt Cups
- Reheating Red, White and Blue Dirt Cups
- Frequently Asked Questions
- How do I make Red, White and Blue Dirt Cups ahead of time?
- What are some variations of Red, White and Blue Dirt Cups?
- Can I use different cookies instead of Oreos?
- Are Red, White and Blue Dirt Cups suitable for kids?
- Final Thoughts
- 📖 Recipe Card
Why You’ll Love This Recipe
- Easy to Make: With just a few simple steps, you can whip up these delicious desserts in no time.
- Fun for All Ages: Kids love the colorful layers and gummy worms, making it a great project for family gatherings.
- Customizable: Feel free to change up colors or add different toppings according to your theme or preference.
- No Baking Required: This no-bake dessert allows you to spend more time enjoying the festivities rather than being stuck in the kitchen.
- Perfect for Parties: The individual servings make it easy to serve at barbecues, picnics, or holiday celebrations.
Tools and Preparation
Before diving into this fun recipe, gather your tools. Having everything ready will make the process smooth and enjoyable.
Essential Tools and Equipment
- Mixing bowl
- Whisk
- Clear plastic cups (9 oz)
- Measuring cups
- Spoon for layering
Importance of Each Tool
- Mixing bowl: A large mixing bowl is essential for combining ingredients thoroughly without spilling.
- Whisk: Using a whisk ensures that your pudding mix becomes smooth without clumps.
- Clear plastic cups: These cups not only hold your dessert but also showcase the beautiful layers you create.
Ingredients
For these delightful Red, White and Blue Dirt Cups, you’ll need:
Pudding Base
- Cheesecake Pudding Mix
- Milk
Toppings and Layers
- Oreo Cookies, crushed
- Red & Blue Gel Food Coloring
- Red & Blue Gummy Worms
- Flag Cupcake Toppers
Serving Dish
- Clear Plastic Cups, 9oz
How to Make Red, White and Blue Dirt Cups
Step 1: Prepare the Pudding Mixture
- Place both boxes of pudding in a large mixing bowl.
- Add the milk to the bowl.
- Whisk until the mixture thickens.
Step 2: Color the Pudding
- Divide the pudding into two separate bowls:
- Pour 1 cup of pudding into one bowl.
- Pour 1 ½ cups of pudding into another bowl.
- Add blue gel food coloring to the first bowl and stir until uniform in color.
- Add red gel food coloring to the second bowl and mix until no streaks remain.
Step 3: Layer Your Cups
- Line up your clear plastic cups on a flat surface.
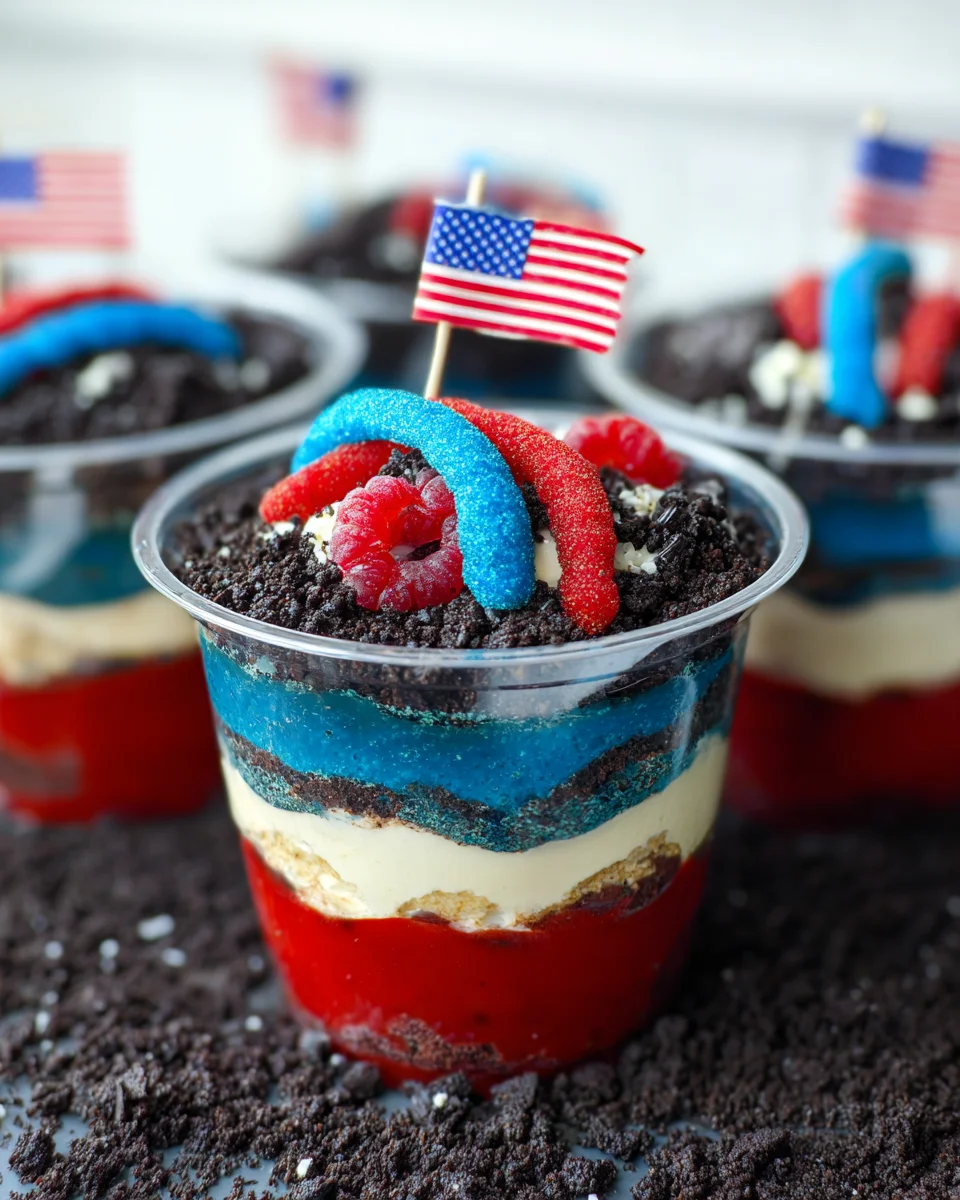
- In each cup, place 1 tablespoon of crushed Oreos at the bottom as the first layer, spreading evenly.
- On top of the Oreos, add 2 tablespoons of blue pudding; spread it evenly across the cup.
- Follow with another tablespoon of crushed Oreos as the next layer; spread evenly again.
- Next, add 3 tablespoons of white pudding on top; spread it evenly throughout.
- Continue layering by adding 1 ½ tablespoons of white pudding followed by spreading evenly again.
- Now add 4 tablespoons of red pudding as the final colored layer; ensure it’s spread evenly across each cup.
- For finishing touches, sprinkle 2 tablespoons of crushed Oreos on top as a garnish.
Step 4: Add Fun Toppings
- Top each cup with two gummy worms for decoration.
- Finish off with one flag cupcake topper per cup.
With these simple steps, your Red, White and Blue Dirt Cups will be ready to impress! Enjoy this festive treat with family and friends!
How to Serve Red, White and Blue Dirt Cups
Red, White and Blue Dirt Cups are not only delicious but also visually stunning. They make a perfect addition to any patriotic celebration. Here are some creative serving suggestions for these delightful dessert cups.
Individual Servings
- Use clear plastic cups to showcase the vibrant layers of pudding and Oreos. This allows guests to appreciate the colors and textures in each cup.
Party Platter
- Arrange several cups on a festive platter for a striking centerpiece. Add flags or sparklers for extra flair.
Picnic Treats
- Pack them up for a picnic! These cups are easy to transport and will impress everyone at your outdoor gathering.
Kid-Friendly Serving
- Allow kids to decorate their own cups with additional toppings like whipped cream or sprinkles, making it a fun activity.
Dessert Bar
- Set up a dessert bar where guests can assemble their own Red, White and Blue Dirt Cups, providing various toppings and mix-ins.
How to Perfect Red, White and Blue Dirt Cups
To ensure your Red, White and Blue Dirt Cups turn out perfectly every time, follow these essential tips.
- Use cold milk: Starting with cold milk helps the pudding set properly for a creamy texture.
- Layer carefully: Take your time when layering the ingredients. This enhances the visual appeal of each cup.
- Chill before serving: Letting the cups sit in the refrigerator for at least an hour allows flavors to meld together beautifully.
- Customize toppings: Feel free to add other patriotic-themed toppings like blueberries or strawberries for added flavor.
Best Side Dishes for Red, White and Blue Dirt Cups
Pairing side dishes with your Red, White and Blue Dirt Cups can enhance the overall experience of your meal. Here are some great options:
- Grilled Hot Dogs: Classic summer fare that pairs well with sweet desserts.
- Potato Salad: A creamy potato salad adds a savory touch that balances the sweetness of the dirt cups.
- Fruit Skewers: Colorful fruit skewers can provide a refreshing contrast to the rich pudding.
- Corn on the Cob: Sweet corn is another great complement that brings summer flavors to your table.
- Caprese Salad: Fresh tomatoes and mozzarella offer a light option that contrasts nicely with rich desserts.
- Veggie Platter: Crisp vegetables with dip provide crunch and freshness alongside the sweet treats.
- BBQ Chicken Wings: Spicy wings can be an exciting contrast to the cool sweetness of your dirt cups.
- Pasta Salad: A chilled pasta salad can add heartiness without overwhelming flavors.
These side dishes will surely enhance any gathering featuring your delightful Red, White and Blue Dirt Cups!
Common Mistakes to Avoid
Creating Red, White and Blue Dirt Cups can be a fun experience, but there are some common pitfalls to watch out for.
- Using the wrong pudding mix: Always choose cheesecake pudding for the best flavor and texture. Other flavors may not complement the Oreos.
- Skipping the layering: Properly layering the ingredients is crucial for both appearance and taste. Take your time to spread each layer evenly for the best results.
- Not chilling the cups: Allowing the cups to chill for a short time helps set layers. Skipping this step can lead to a messy presentation.
- Overmixing colors: When adding food coloring, mix gently until no streaks remain. Overmixing can create muddy colors instead of vibrant layers.
- Ignoring serving size: This recipe is designed for four servings. Adjust ingredient quantities if you’re serving more guests.
Storage & Reheating Instructions
Refrigerator Storage
- Store leftover Red, White and Blue Dirt Cups in an airtight container.
- They can be kept in the refrigerator for up to 3 days.
Freezing Red, White and Blue Dirt Cups
- It’s best not to freeze these dessert cups as they may lose texture when thawed.
- If you must freeze them, use freezer-safe containers and consume within 2 weeks.
Reheating Red, White and Blue Dirt Cups
- Oven: Not recommended as it may alter the texture of the pudding.
- Microwave: Use cautiously with short intervals (10-15 seconds) to avoid melting layers.
- Stovetop: Not advisable since it may ruin the layered effect of this dessert.
Frequently Asked Questions
How do I make Red, White and Blue Dirt Cups ahead of time?
You can prepare these dirt cups a day in advance. Just store them covered in the refrigerator until you’re ready to serve.
What are some variations of Red, White and Blue Dirt Cups?
Consider using different flavored puddings or adding fresh fruit between layers for added flavor and nutrition!
Can I use different cookies instead of Oreos?
Absolutely! Try using other chocolate sandwich cookies or even graham crackers for a unique twist on this recipe.
Are Red, White and Blue Dirt Cups suitable for kids?
Yes! This fun dessert is loved by kids and adults alike, making it perfect for parties or family gatherings.
Final Thoughts
Red, White and Blue Dirt Cups are not only visually appealing but also incredibly delicious and easy to make! They can be customized with various toppings or flavors, allowing everyone to put their spin on this festive treat. Give this recipe a try at your next gathering!
Did You Enjoy Making This Recipe? Please rate this recipe with ⭐⭐⭐⭐⭐ or leave a comment.
📖 Recipe Card
Print
Red, White and Blue Dirt Cups
- Total Time: 20 minutes
- Yield: 4 servings
Description
Delight in the festive spirit with Red, White and Blue Dirt Cups, a no-bake dessert that captures the essence of summer celebrations such as the 4th of July. These vibrant cups are filled with layers of creamy cheesecake pudding, crushed Oreos, and colorful toppings, making them a favorite among both kids and adults. Not only are they visually stunning, but their easy preparation allows you to spend more time enjoying your gathering rather than being stuck in the kitchen. Perfect for barbecues, picnics, or holiday parties, these dirt cups provide an interactive dessert experience that is sure to impress your guests.
Ingredients
- Cheesecake Pudding Mix
- Milk
- Crushed Oreo Cookies
- Red & Blue Gel Food Coloring
- Red & Blue Gummy Worms
- Clear Plastic Cups (9 oz)
Instructions
- In a large mixing bowl, combine pudding mix and milk. Whisk until thickened.
- Divide the mixture into two bowls; add blue food coloring to one and red food coloring to the other.
- Layer each cup starting with crushed Oreos, followed by blue pudding, more Oreos, white pudding, and finally red pudding.
- Top each cup with gummy worms and a flag cupcake topper.
- Prep Time: 20 minutes
- Cook Time: 0 minutes
- Category: Dessert
- Method: No-bake
- Cuisine: American
Nutrition
- Serving Size: 1 cup (150g)
- Calories: 320
- Sugar: 25g
- Sodium: 210mg
- Fat: 14g
- Saturated Fat: 8g
- Unsaturated Fat: 5g
- Trans Fat: 0g
- Carbohydrates: 45g
- Fiber: 2g
- Protein: 4g
- Cholesterol: 20mg
